
AI Image Editor Basics (Overview of the 6 Modes)
The AI Image Editor lets you edit parts of your renderings or photos to finish them. In a project, open the Edit tab and choose a mode from Edit Mode at the top of the left panel.
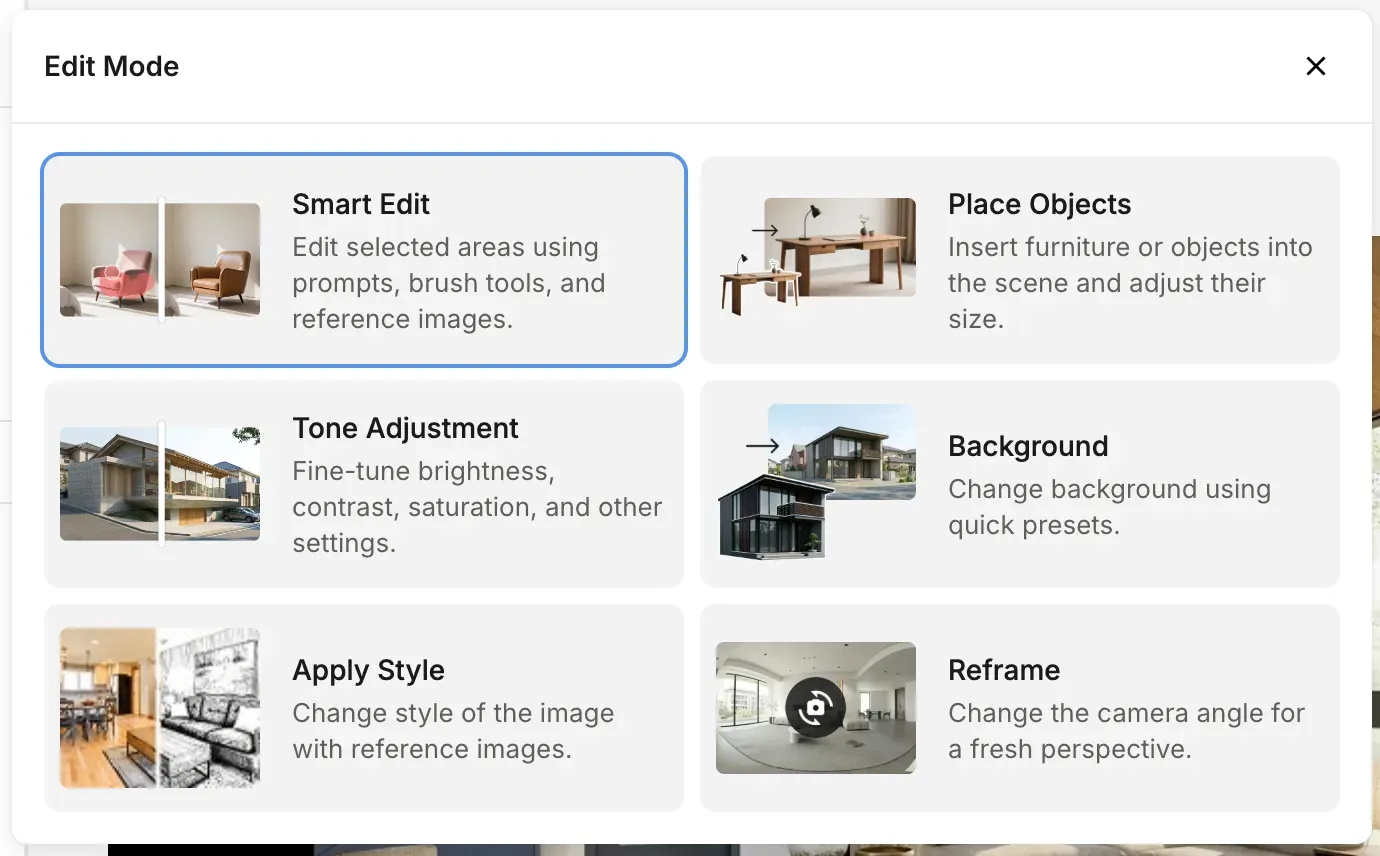
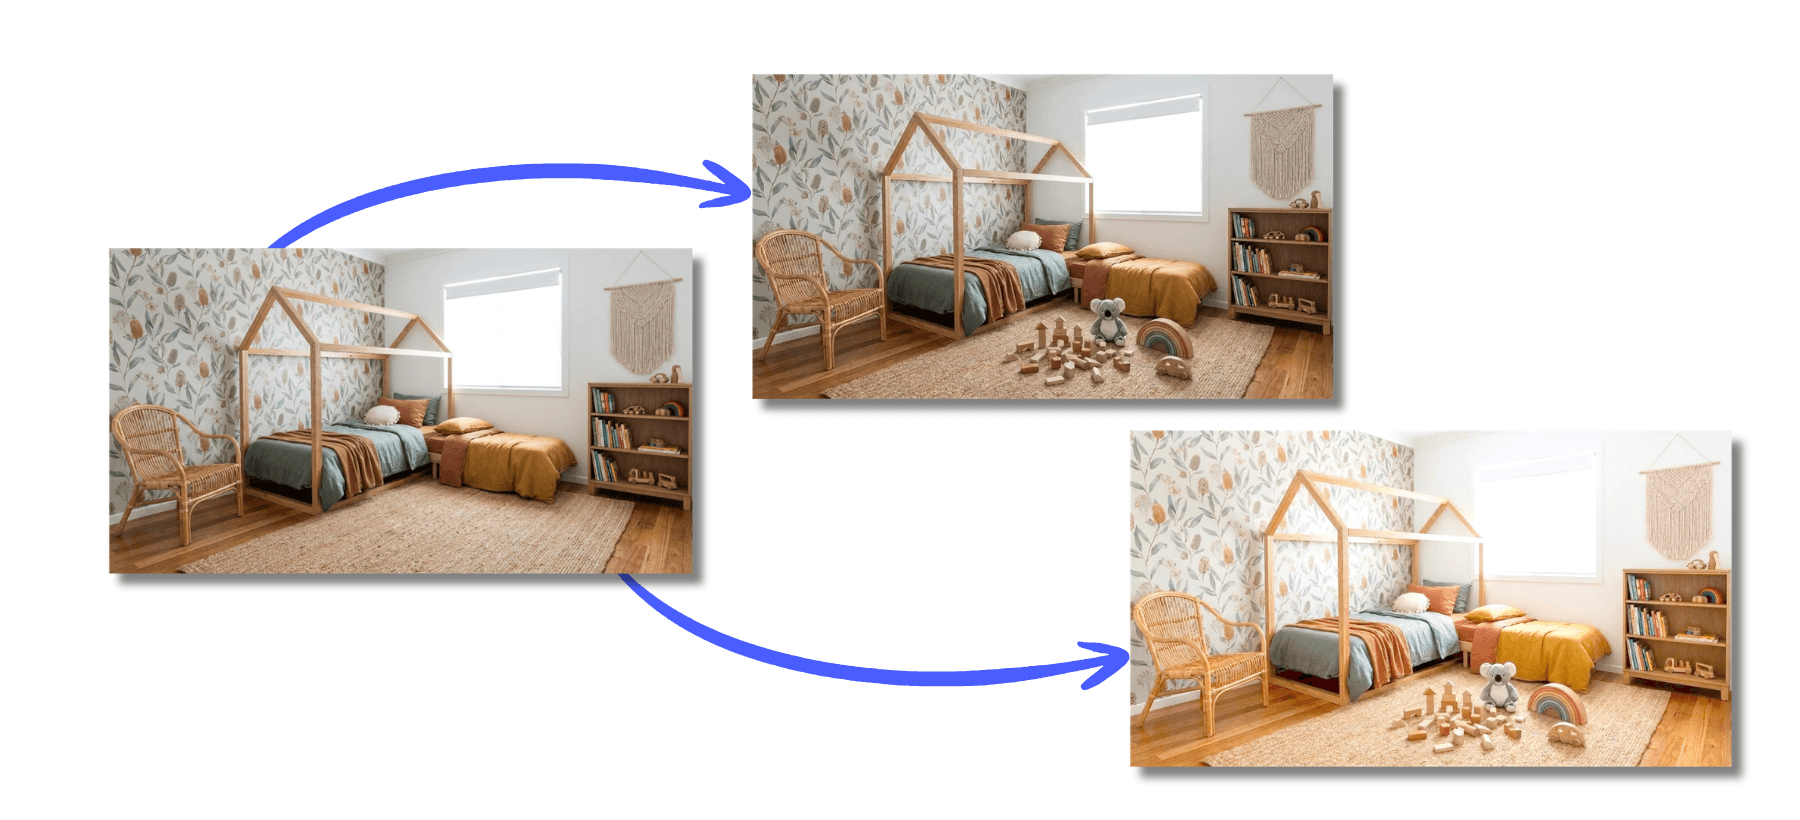
The 6 Edit Modes
- Smart Edit: Mark areas on the image and describe what to change, using prompts, drawing tools and reference images. Up to 5 requests in one generation.
- Place Objects: Insert furniture or other objects into the scene and adjust their size.
- Tone Adjustment: Fine-tune brightness, contrast, saturation and other settings.
- Background: Change the background using quick presets.
- Apply Style: Change the style of the image using reference images.
- Reframe: Change the camera angle for a fresh perspective.
To remove an object, use Smart Edit with the Remove request type.
Quick Workflow: Smart Edit Step by Step
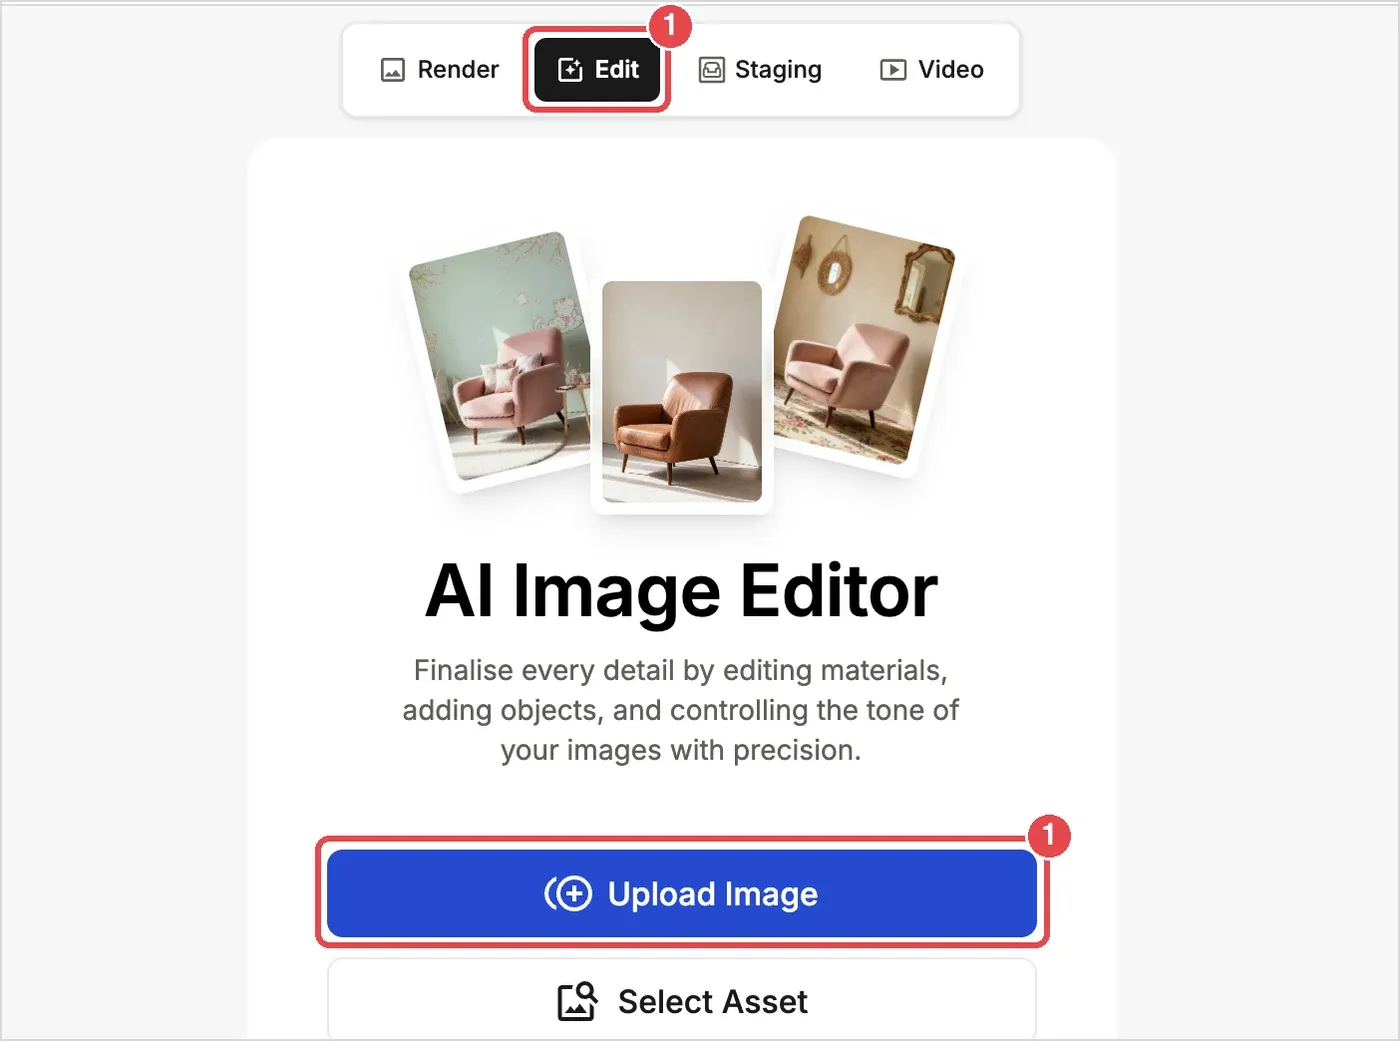
- Open the editor: On Home, click the AI Image Editor tile, or open the Edit tab in a project. Load your image with Upload Image (or Select Asset).
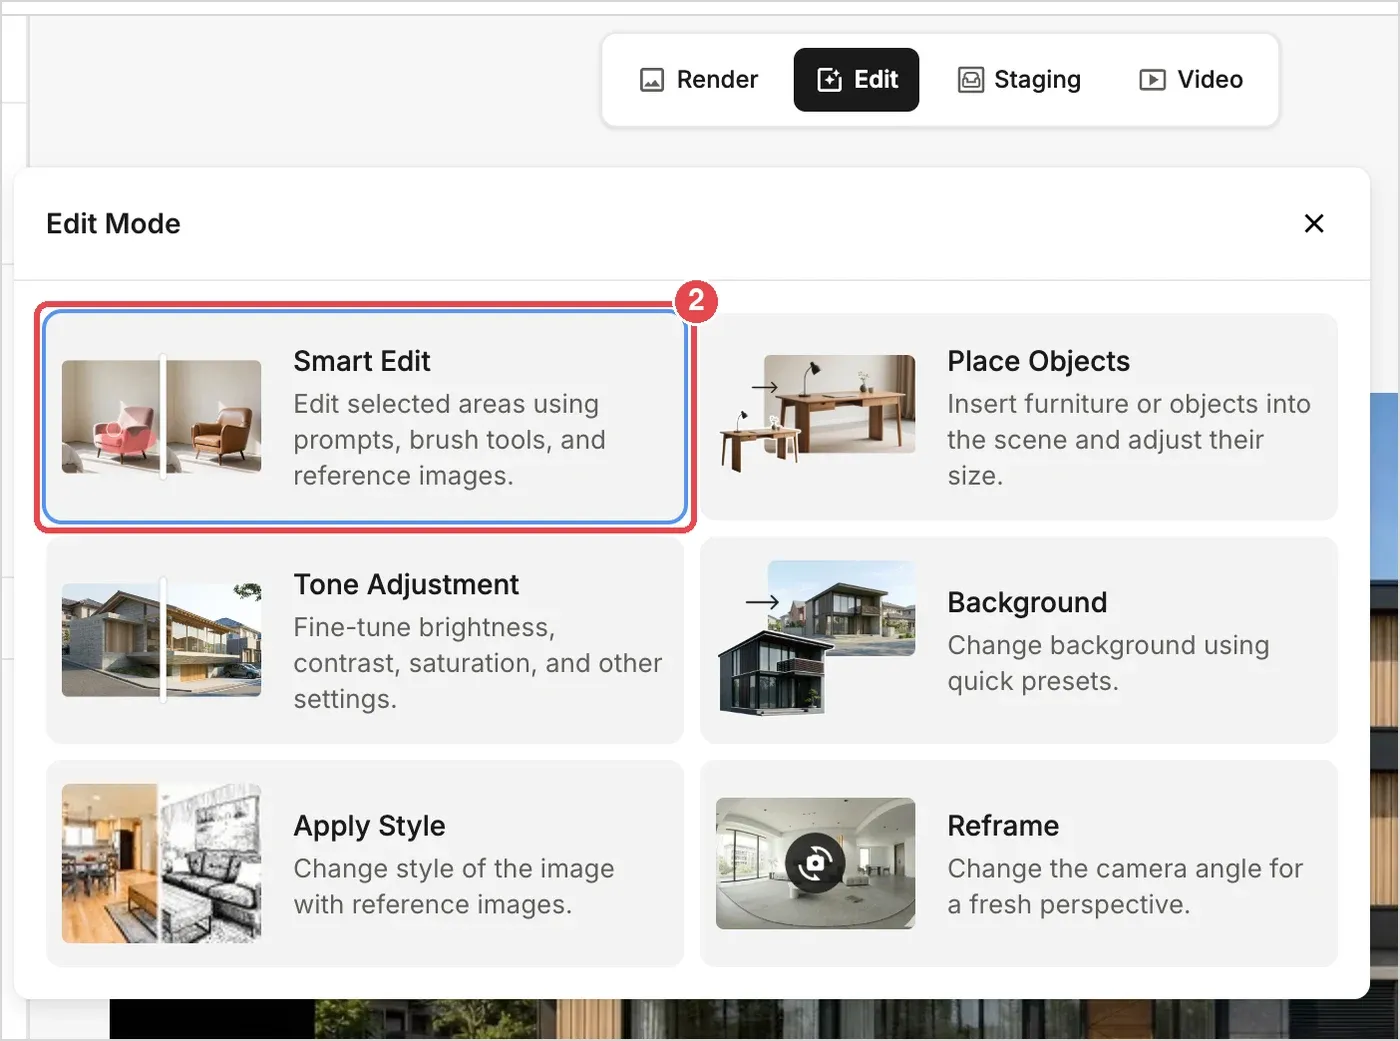
- Choose the Edit Mode: Open the Edit Mode menu and select Smart Edit.
- Mark the area: With the Rectangle tool, drag over the part you want to change. A request panel opens.
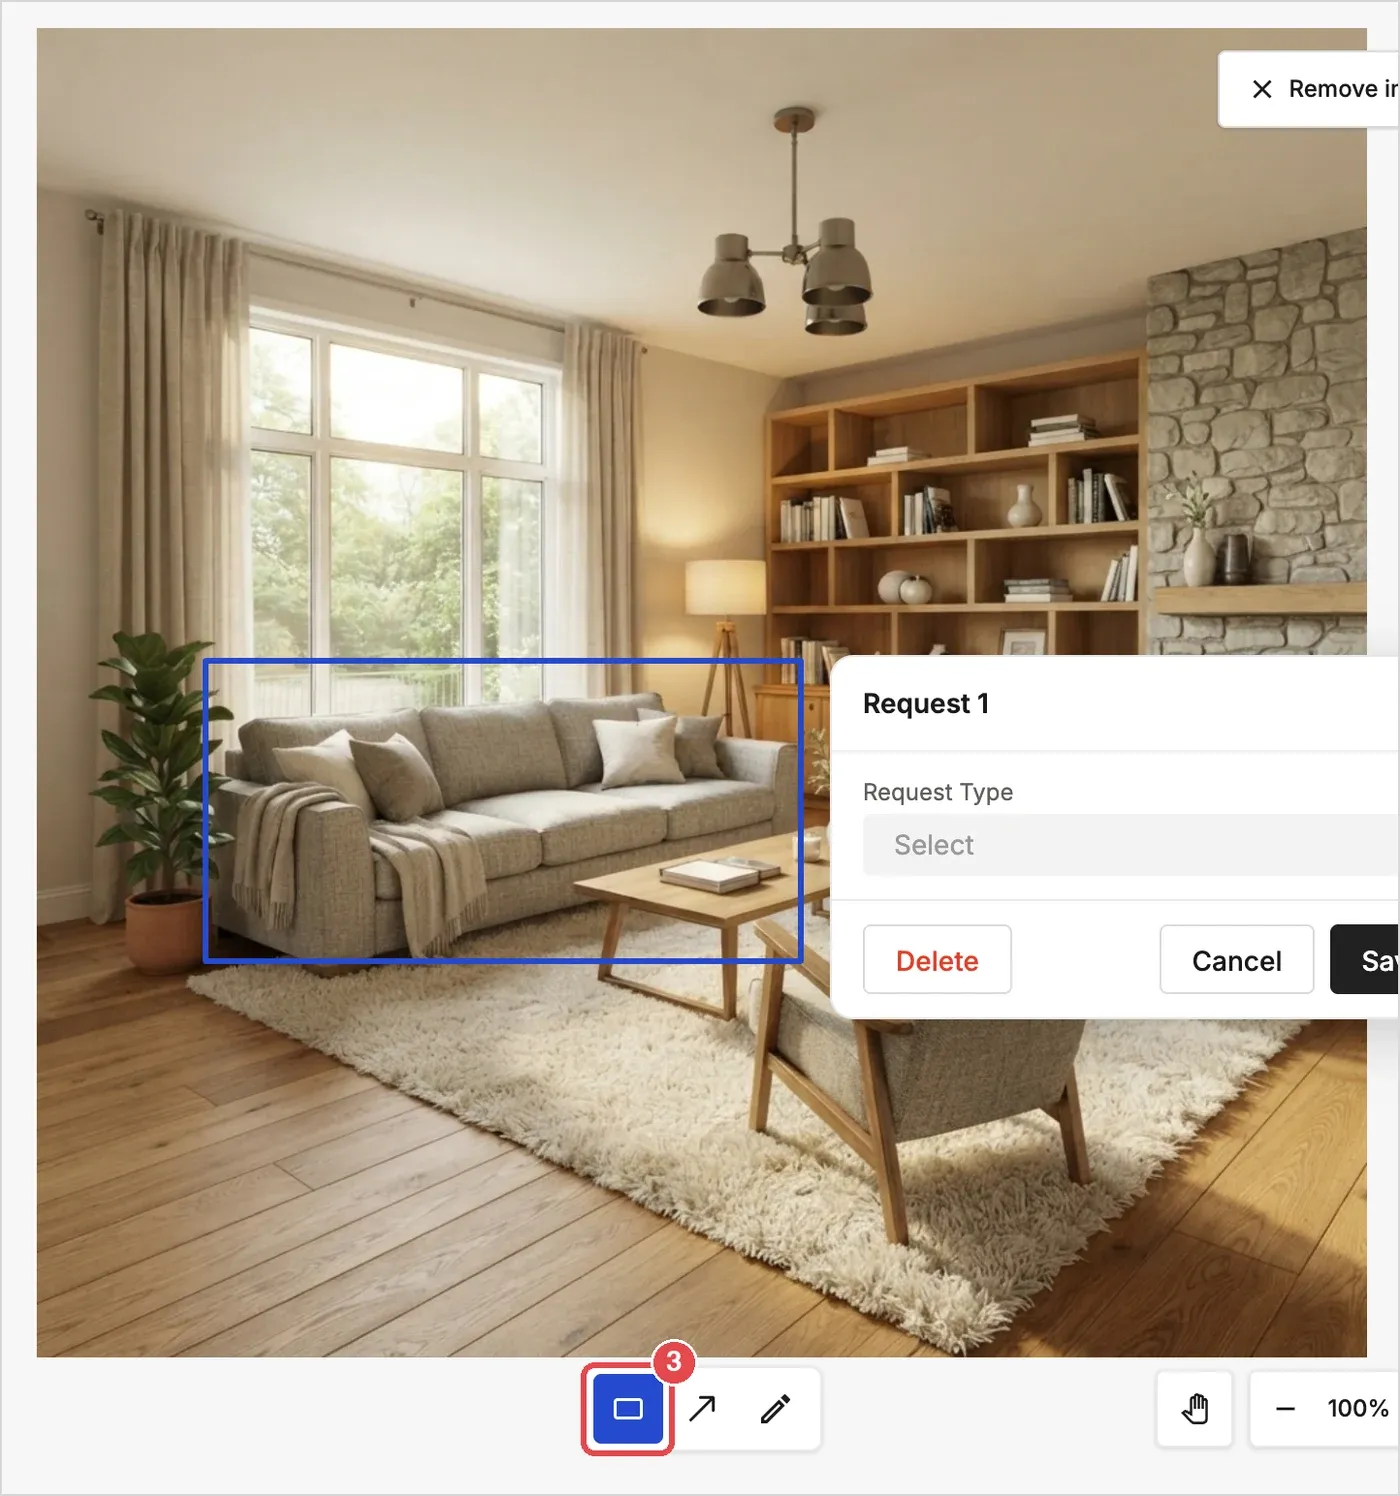
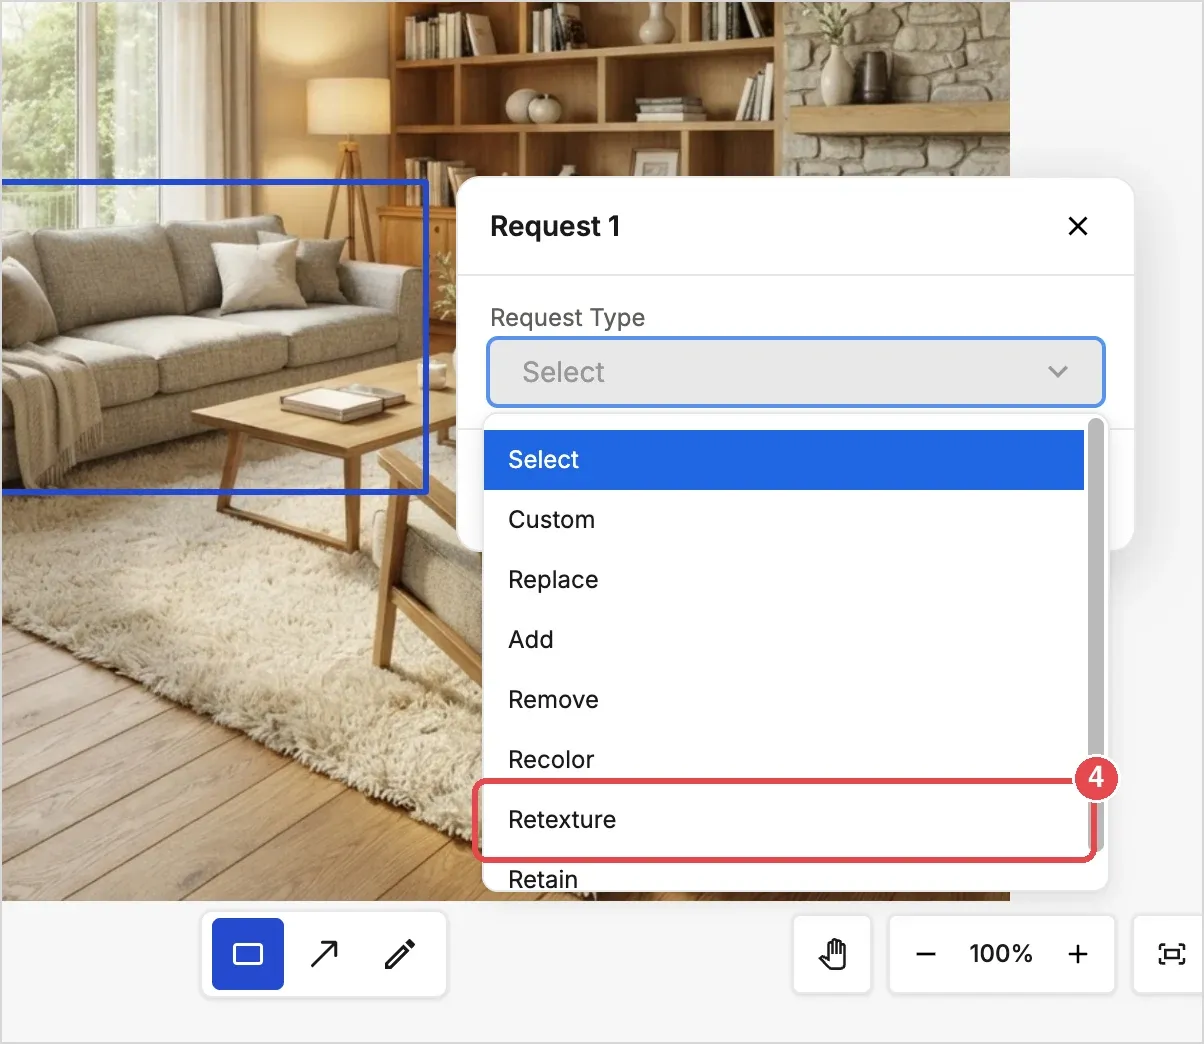
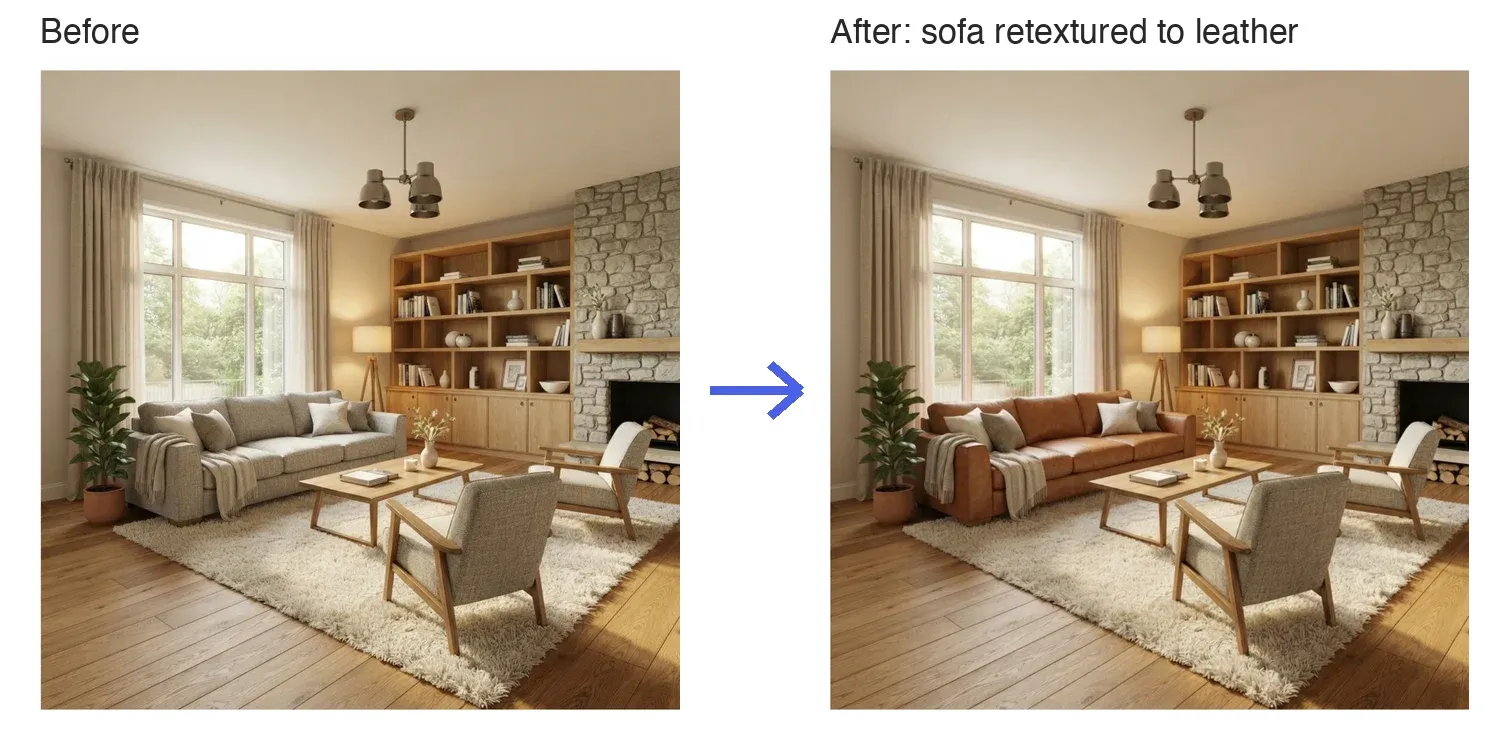
- Choose a Request Type: In this example, choose Retexture.
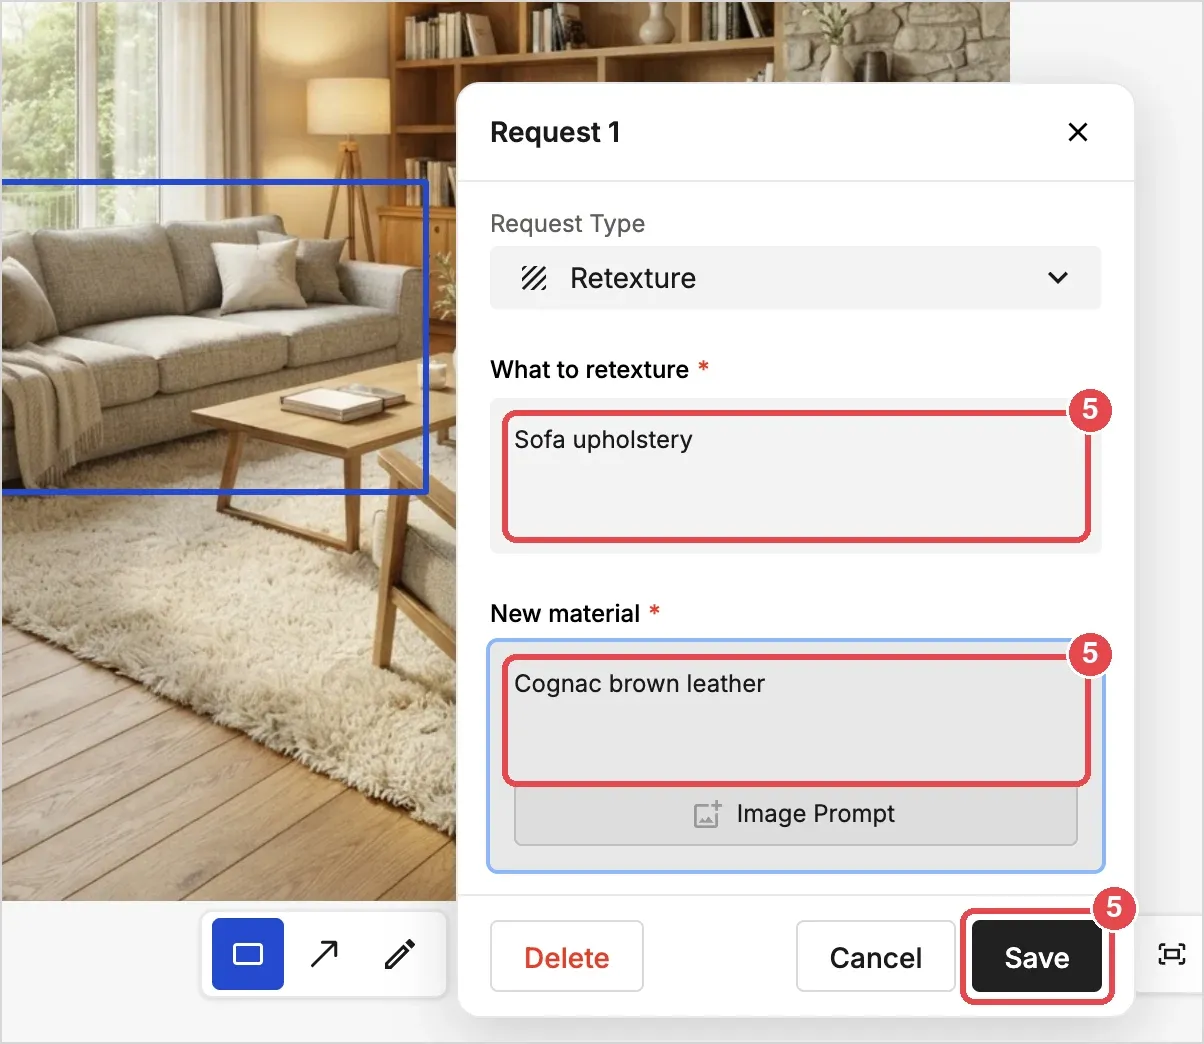
- Describe the change: Enter what to change and the new material, then click Save.
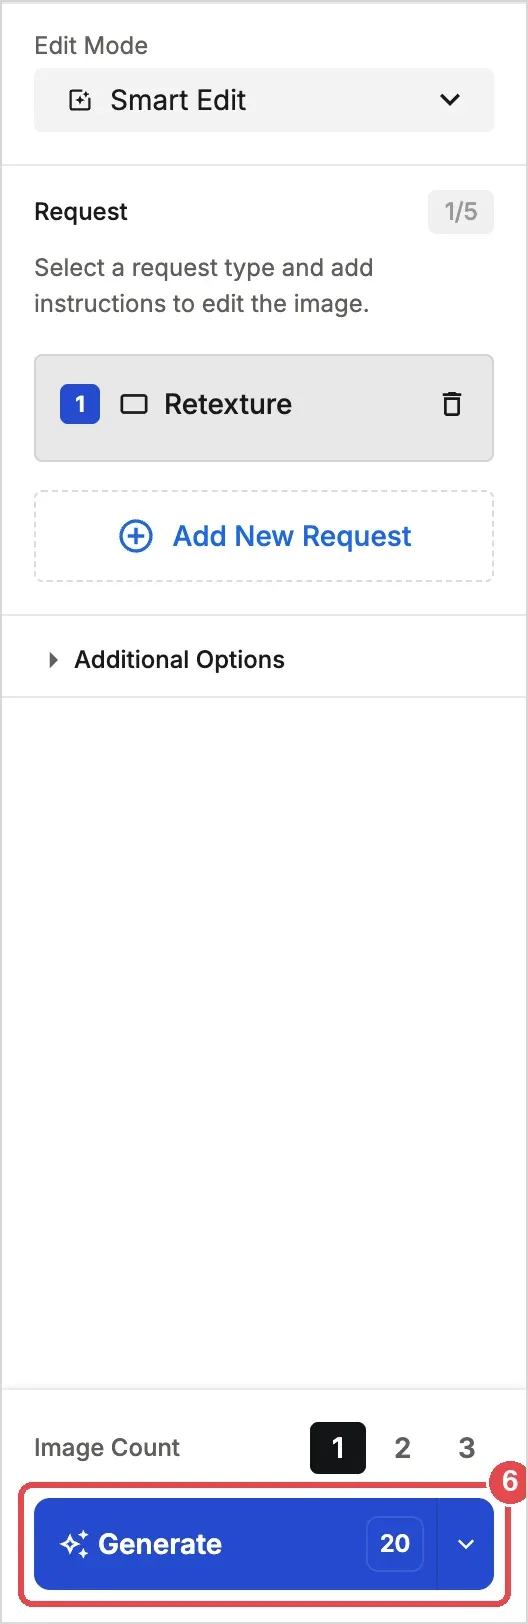
- Generate: Click Generate (20 credits).
Additional Options (All Edit Modes)
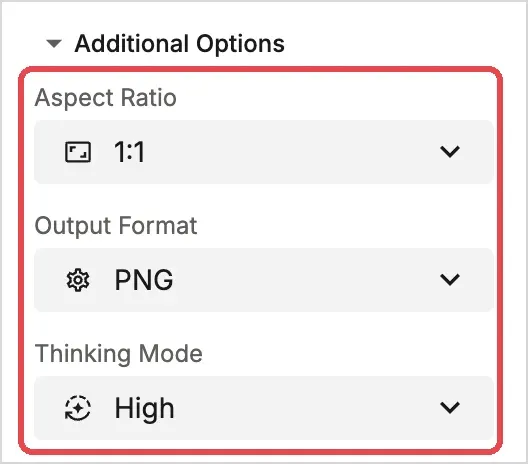
Every edit mode has an Additional Options section in the left panel:
- Aspect Ratio: The shape of the output image.
- Output Format: PNG (default), WebP or JPG.
- Thinking Mode: Auto, High, Medium, Low or Minimal.
💡 Tip: AI edits cost 20 credits each, but Tone Adjustment doesn't use AI generation, so it's free. When you only want to adjust colors, use Tone Adjustment to save credits.